
Happy March and happy National Craft Month! In honor, here are Mom’s instructions for making a…
Granny Square Pullover Vest With Options (Plus Collar, Sleeves & Waistband)
By Gloria Pitzer, as seen in her self-published newsletter… Granny Square How To (Secret RecipesTM, St. Clair, MI; Fall 1986, p. 3).
[NOTE: As always, I’m asking only for proper credit if you care to re-share this.]
[LADIES] GARMENT SIZE CHART:
Large – 16 to 18
Medium – 12 to 14
Small – 8 to 10
INGREDIENTS/ITEM NEEDS:
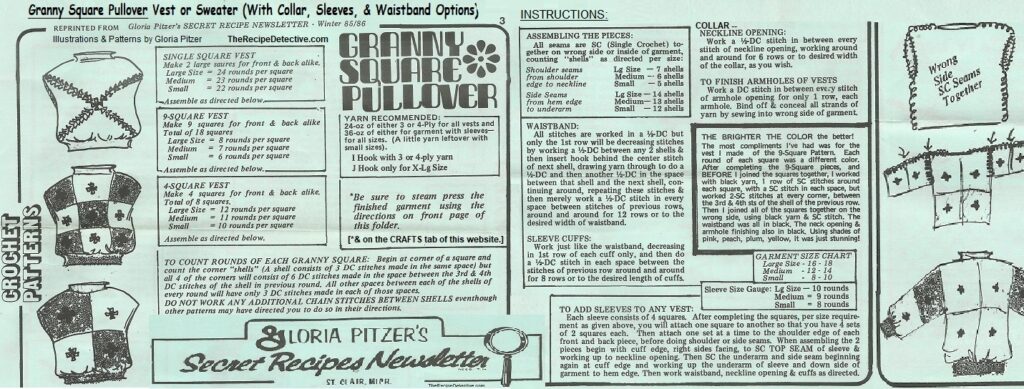
YARN RECOMMENDED:
24-oz of either 3- or 4-ply for all vests and 36-oz of either [ply] for garment with sleeves – for all sizes. A little yarn [will be] leftover with small sizes. [Use:]
I-Hook with 3- or 4-ply yarn
J-Hook only for X-lg. size
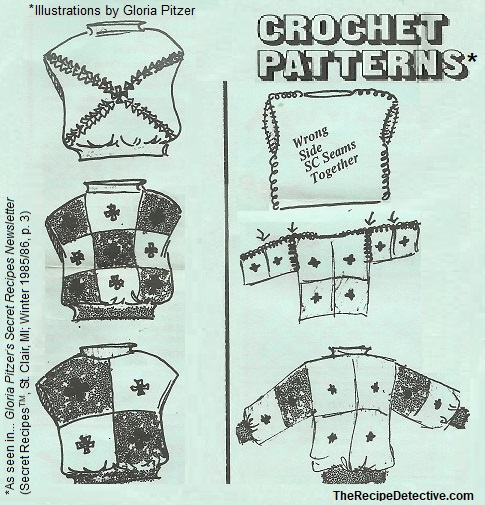
SINGLE SQUARE VEST*:
Make 2 large squares for front & back alike.
Large Size = 24 rounds** per square
Medium = 23 rounds** per square
Small = 22 rounds** per square
Assemble as directed below.
9-SQUARE VEST*:
Make 9 [small] squares for front & back alike. Total of 18 squares.
Large Size = 8 rounds** per square
Medium = 7 rounds** per square
Small = 6 rounds** per square
Assemble as directed below.
4-SQUARE VEST*:
Make 4 [medium] squares for front & back alike. Total of 8 squares.
Large Size = 12 rounds** per square
Medium = 11 rounds** per square
Small = 10 rounds** per square
Assemble as directed below.
*STEAM PRESS THE FINISHED GARMENT:
Be sure to steam press the finished garment using the directions [posted on the Crafts tab for “How To Steam Press Granny Square Garments”].
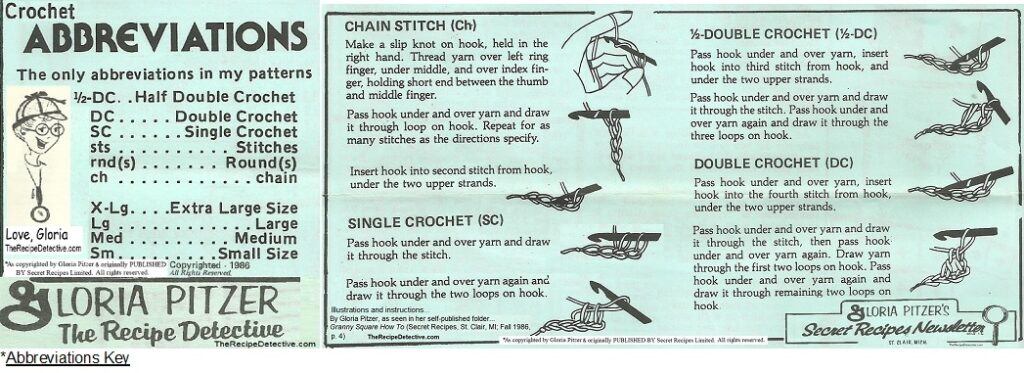
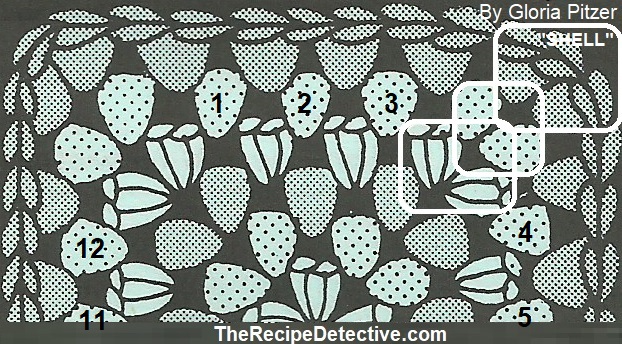
**TO COUNT THE ROUNDS OF EACH GRANNY SQUARE:
Begin at corner of square and count the corner “shells”. (A “shell” consists of 3 DC sts made in the same space.) But all 4 of the corners will consist of 6 DC sts made in the space between the 3rd & 4th DC sts of the shell in the previous round. All other spaces between each of the “shells” of every round will have only 3 DC sts made in each of those spaces.
DO NOT WORK ANY ADDITIONAL CHAIN STITCHES BETWEEN “SHELLS” – even though other patterns may have directed you to do so in their [instructions].
INSTRUCTIONS:
ASSEMBLING THE PIECES:
All seems are SC (Single Crochet) together on wrong side or inside of garment, counting “shells” as directed, per size:
Shoulder seams (from shoulder edge to neckline)…
Lg Size = 7 “shells”
Medium = 6 “shells”
Small = 5 “shells”
Side seams (from hem edge to underarm)…
Lg. Size = 14 “shells”
Medium = 13 “shells”
Small = 12 “shells”
TO FINISH ARMHOLES OF VEST:
Work a DC stitch in between every stitch of armhole opening for only 1 row, on each armhole. Bind off and conceal all strands of yarn, by sewing into wrong side [or inside] of garment.
TO ADD SLEEVES TO ANY VEST:
SLEEVE SIZE GUAGE:
Large Size = 10 rounds per square
Medium = 9 rounds per square
Small = 8 rounds per square
Each sleeve consists of 4 squares. After completing the squares per size requirement, as given above, you will attach one square to another so that you have 4 sets of 2 squares each. Then attach one set at a time to the shoulder edge of each front and back piece BEFORE DOING SHOULDER OR SIDE SEEMS.
When assembling the 2 pieces, start with the cuff edge, right sides [outsides] facing, to SC TOP SEAM of sleeve and working up to neckline opening. Then SC the underarm and side seam, beginning again at the cuff edge and working up the underarm of the sleeve and down the side of the garment to the hem edge.
Then work waistband, neckline opening and cuffs as directed.
[COLLAR] NECKLINE OPENING:
Work a ½-DC stitch in between every stitch of neckline opening, working around and around for 6 rows or to desired width of the collar, as you wish.
WAISTBAND:
All stitches are worked in a ½-DC [stitch] between any 2 “shells” and then insert hook behind the center stitch of next “shell”, drawing yarn through to do a ½-DC [stitch] and then another ½-DC [stitch] in the space between that “shell” and the next “shell”.
Continue around, repeating these stitches and then merely work a ½-DC [stitch] in every space between stitches of previous row – around and around for 12 rows or to the desired width of waistband.
SLEEVE CUFFS:
Work just like the waistband, decreasing in first row of each cuff only and then do a ½-DC stitch in each space between stitches of previous row – around and around for 8 rows or to the desired length of cuffs.

LAST THOUGHTS…
For questions or comments, you can email me at therecipedetective@outlook.com. I’m also on Facebook: @TheRecipeDetective.
[NOTE: As always, I’m asking only for proper credit if you care to re-share this.]

See also: